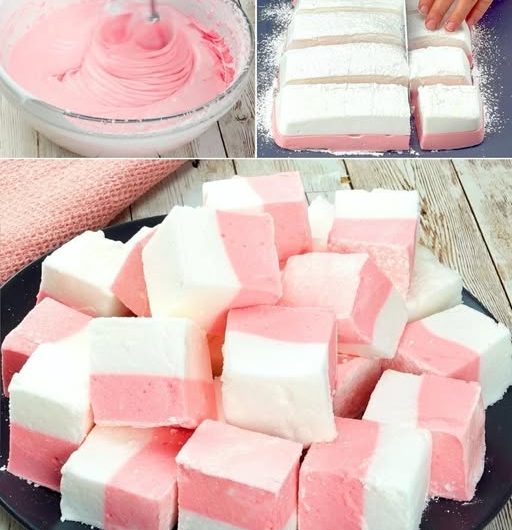
Homemade Marshmallows
Homemade marshmallows are dramatically different from most store-bought versions. They are softer, richer, fresher, and far more flavorful. Properly made marshmallows have a delicate vanilla aroma, a light and fluffy texture, and a smooth melt-in-the-mouth finish.
This recipe is designed to be extremely detailed, highly readable, and reliable for beginners while still containing professional-level techniques and explanations.
The method below creates classic vanilla marshmallows with excellent structure for:
- Eating plain
- Hot chocolate
- S’mores
- Dessert toppings
- Gift boxes
- Chocolate coating
- Flavor variations
The recipe also includes troubleshooting, storage guidance, texture adjustments, and advanced techniques.
Yield
Approximately 36 marshmallows depending on size.
Texture Profile
These marshmallows are:
- Soft
- Airy
- Slightly chewy
- Smooth
- Easy to cut
- Stable at room temperature
Preparation Time
| Task | Time |
|---|---|
| Preparation | 20 minutes |
| Cooking syrup | 15 minutes |
| Whipping | 12 minutes |
| Setting time | 6–8 hours |
| Cutting and coating | 15 minutes |
Equipment
Accurate equipment matters greatly for marshmallows because sugar temperature directly affects texture.
You will need:
- Stand mixer or powerful hand mixer
- Candy thermometer
- Medium saucepan
- Heatproof spatula
- 9×13-inch pan
- Parchment paper
- Fine mesh sieve
- Sharp knife or pizza cutter
- Large mixing bowl
Ingredients
Gelatin Mixture
- 3 tablespoons unflavored powdered gelatin
- ½ cup cold water
Sugar Syrup
- 2 cups granulated sugar
- ¾ cup light corn syrup
- ½ cup water
- ¼ teaspoon salt
Flavoring
- 2 teaspoons pure vanilla extract
Coating Mixture
- ½ cup powdered sugar
- ½ cup cornstarch
Understanding the Ingredients
Gelatin
Gelatin creates the marshmallow structure.
When hydrated properly, it traps air and forms the signature fluffy texture.
Do not substitute flavored gelatin.
Blooming the gelatin correctly is extremely important.
Corn Syrup
Corn syrup prevents crystallization and helps create smooth marshmallows.
Without it, the texture may become grainy.
Sugar
Granulated sugar provides sweetness and structure.
The exact cooking temperature determines whether marshmallows become:
- Too soft
- Too dense
- Too rubbery
- Perfectly fluffy
Vanilla
High-quality vanilla dramatically improves flavor because marshmallows have a simple ingredient list.
Cornstarch and Powdered Sugar
This coating prevents sticking.
Cornstarch reduces moisture while powdered sugar adds sweetness and softness.
Before You Begin
Preparation is essential because marshmallow-making moves quickly once the sugar syrup reaches temperature.
Before turning on the stove:
- Measure all ingredients
- Prepare the pan
- Ready the mixer
- Have the thermometer attached
- Keep spatulas nearby
Preparing the Pan
Line a 9×13-inch pan with parchment paper.
Lightly grease the parchment and sides.
Mix together:
- Powdered sugar
- Cornstarch
Dust some of this mixture into the prepared pan.
This prevents sticking later.
Step 1 — Bloom the Gelatin
Place:
- ½ cup cold water
- Gelatin
into the bowl of a stand mixer.
Stir lightly.
Allow the gelatin to sit for 10 minutes.
During this time it absorbs water and becomes thick and jelly-like.
This process is called blooming.
Proper blooming ensures smooth marshmallows without lumps.
Step 2 — Prepare the Sugar Syrup
In a medium saucepan combine:
- Granulated sugar
- Corn syrup
- Water
- Salt
Place over medium heat.
Stir gently only until the sugar dissolves.
Once dissolved, stop stirring.
Why You Must Stop Stirring
Continuous stirring after boiling can cause sugar crystals to form.
Crystallization creates gritty marshmallows instead of smooth ones.
Step 3 — Cook the Syrup
Attach the candy thermometer.
Increase heat to medium-high.
Cook until the syrup reaches:
240°F (115°C)
This is called the soft-ball stage.
Temperature accuracy is critical.
What Happens at 240°F
At this stage the syrup contains the correct balance of:
- Water
- Sugar concentration
- Elasticity
This creates marshmallows that are fluffy yet stable.
Common Temperature Problems
| Temperature | Result |
|---|---|
| Too low | Marshmallows stay loose and sticky |
| Too high | Marshmallows become stiff or rubbery |
Step 4 — Carefully Combine Syrup and Gelatin
Turn the mixer to low speed.
Very slowly pour the hot syrup into the bloomed gelatin.
Pour carefully along the side of the bowl.
Avoid pouring directly onto the whisk attachment because hot syrup can splatter dangerously.
Safety Notes
Sugar syrup is extremely hot.
It can cause severe burns.
Work slowly and carefully.
Step 5 — Whip the Mixture
Once all syrup is added:
Increase mixer speed gradually to high.
Whip for 10–12 minutes.
What Happens During Whipping
Whipping performs several functions simultaneously:
- Incorporates air
- Expands volume
- Cools the mixture
- Activates gelatin structure
- Creates fluffy texture
Visual Changes During Whipping
The mixture will transform from:
Thin and transparent
to
Thick, white, glossy, and fluffy.
How to Know It Is Ready
The marshmallow mixture should:
- Triple in volume
- Hold soft peaks
- Look glossy
- Feel warm, not hot
When the whisk lifts, the mixture should slowly ribbon back into the bowl.
Step 6 — Add Vanilla
Add vanilla extract during the final minute of whipping.
Mix just until incorporated.
Step 7 — Transfer to Pan
Immediately pour the marshmallow mixture into the prepared pan.
Work quickly because the mixture begins setting fast.
Use a greased spatula to smooth the surface.
Dust additional cornstarch-powdered sugar mixture over the top.
Step 8 — Let Marshmallows Set
Allow marshmallows to sit uncovered at room temperature for:
6–8 hours
Overnight is even better.
Do not refrigerate.
Refrigeration introduces moisture and can damage texture.
Step 9 — Remove from Pan
Dust a work surface generously with coating mixture.
Turn marshmallow slab out onto the surface.
Peel away parchment paper carefully.
Dust exposed sticky areas.
Step 10 — Cut Marshmallows
Use:
- Sharp knife
- Kitchen scissors
- Pizza cutter
Lightly grease the blade for cleaner cuts.
Cut into squares or desired shapes.
Step 11 — Coat the Pieces
Toss cut marshmallows in remaining coating mixture.
Ensure all sides are covered.
This prevents sticking during storage.
Final Texture
Properly made marshmallows should be:
- Soft but structured
- Light and airy
- Slightly elastic
- Easy to bite
- Smooth inside
- Not wet or sticky
Storage
Room Temperature
Store in an airtight container for up to 3 weeks.
Keep in a cool, dry place.
Avoid Refrigeration
Refrigeration introduces humidity and causes stickiness.
Freezing
Freezing is not ideal because texture changes after thawing.
Flavor Variations
Chocolate Marshmallows
Add:
- ¼ cup cocoa powder
during whipping.
Maple Marshmallows
Replace part of the corn syrup with maple syrup.
Use dark maple syrup for stronger flavor.
Coffee Marshmallows
Dissolve instant espresso powder into the syrup.
Peppermint Marshmallows
Add peppermint extract carefully.
Use very small amounts because peppermint is strong.
Citrus Marshmallows
Add finely grated:
- Orange zest
- Lemon zest
- Lime zest
Toasted Marshmallows
Homemade marshmallows toast beautifully because of their high sugar content.
Use for:
- S’mores
- Hot chocolate
- Ice cream toppings
Chocolate-Dipped Marshmallows
Dip set marshmallows into melted chocolate.
Allow excess chocolate to drip off.
Place on parchment until set.
Advanced Techniques
Using Different Sugars
Small amounts of brown sugar create:
- Caramel notes
- Richer flavor
- Slightly darker color
Too much changes texture significantly.
Honey Marshmallows
Partially replace corn syrup with honey.
This creates floral sweetness and softer texture.
Controlling Texture
Softer Marshmallows
Cook syrup slightly below 240°F.
Firmer Marshmallows
Cook syrup slightly above 240°F.
Even small temperature differences matter greatly.
Professional Marshmallow Tips
Use Fresh Gelatin
Old gelatin weakens structure.
Avoid Humidity
Humid environments create sticky marshmallows.
Dry weather gives the best results.
Work Quickly After Whipping
Once whipped, marshmallow begins setting rapidly.
Clean Tools Immediately
Hardened marshmallow becomes difficult to remove later.
Warm water helps dissolve sticky residue.
Common Problems and Solutions
| Problem | Cause | Solution |
|---|---|---|
| Marshmallows too sticky | Syrup undercooked | Reach full 240°F |
| Grainy texture | Sugar crystallized | Avoid stirring after boiling |
| Dense texture | Insufficient whipping | Whip full 10–12 minutes |
| Rubbery texture | Syrup overheated | Monitor thermometer carefully |
| Marshmallows collapse | Weak gelatin structure | Bloom gelatin properly |
| Difficult cutting | Insufficient coating | Dust generously |
Why Homemade Marshmallows Taste Better
Fresh homemade marshmallows contain:
- More air
- Better vanilla flavor
- Softer texture
- No preservatives
- No artificial aftertaste
The difference becomes especially noticeable in:
- Hot chocolate
- Toasting
- Dessert recipes
Best Uses
Homemade marshmallows work especially well for:
- S’mores
- Hot cocoa
- Gift boxes
- Dessert platters
- Rocky road desserts
- Rice cereal treats
- Cake decoration
Serving Suggestions
Serve marshmallows with:
- Dark hot chocolate
- Coffee drinks
- Graham crackers
- Melted chocolate
- Fresh strawberries
- Caramel sauce
Final Notes
Making marshmallows at home may seem intimidating at first, but the process becomes straightforward once the sugar stages are understood.
The keys to success are:
- Accurate temperature
- Proper whipping
- Good preparation
- Patience during setting
Once mastered, homemade marshmallows become one of the most impressive and versatile homemade confections you can make in a kitchen.